Introduction
Replacing the windshield on a Tesla Model 3 is a high-precision task. Unlike traditional vehicles, the Model 3 integrates structural glass with a sensitive camera suite and a minimalist exterior trim. This guide covers the professional workflow from power-down to final assembly.
Step 1: System Power Down & Service Mode
Safety is paramount. You must de-energize the vehicle to prevent airbag deployment or wiper motor damage.
- Service Mode: Navigate to Software, hold the "Model 3" text, and enter the code "service".
- Power Off: Use the Safety menu to shut down the system.
- 12V/1V Disconnect: Use a 10mm socket to disconnect the negative terminal of the low-voltage battery under the frunk maintenance panel.
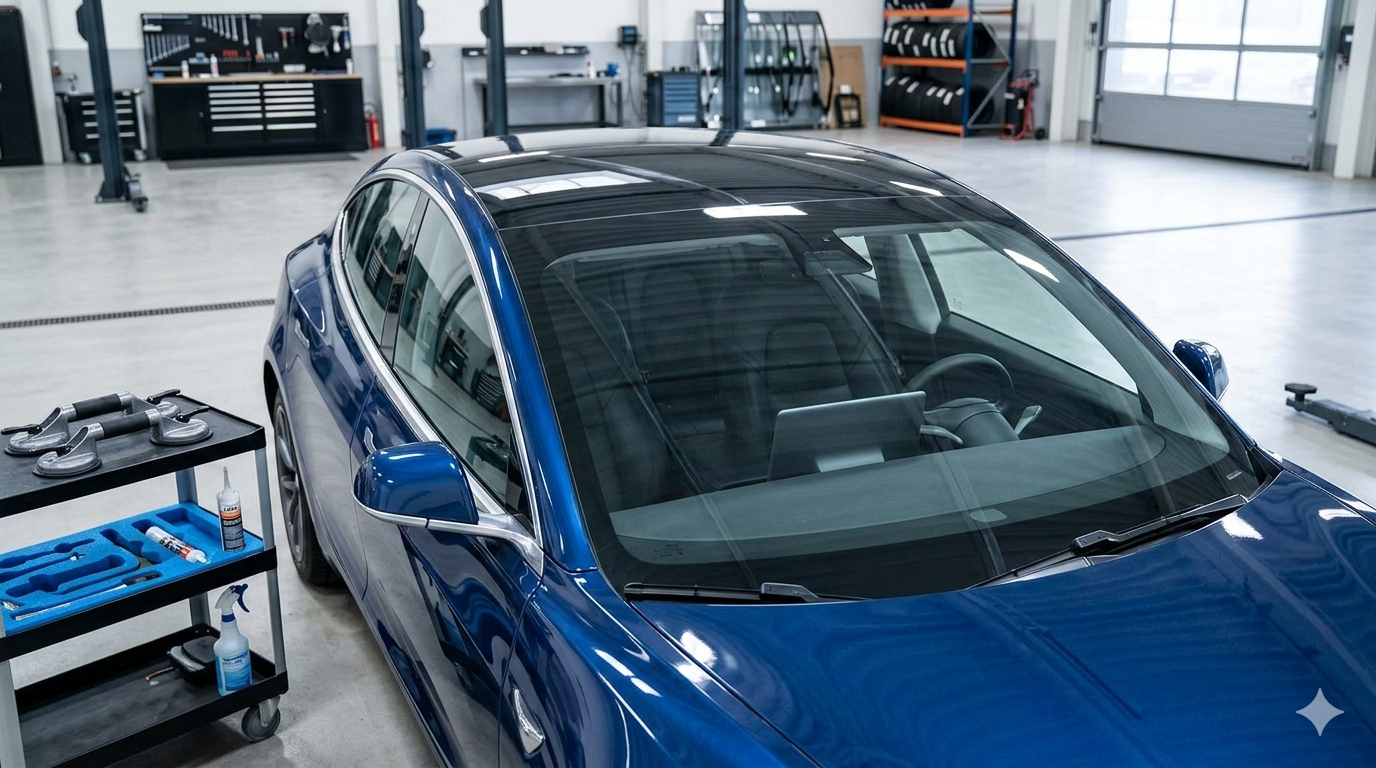
Step 2: Exterior Stripping (Wipers & Cowl)
The Model 3 uses high-tension clips and specific torque specs for its exterior components.
- Wiper Arms: Remove the nut covers and use a 15mm socket. A small puller tool is recommended to avoid stressing the motor.
- Cowl Screen: Remove the push-clips using a plastic trim tool. Carefully disconnect the washer fluid heater electrical connector and the fluid hose.
- A-Pillar Brightwork: Use a non-marring pry tool to release the side moldings. These are prone to bending, so apply even pressure.
Step 3: Interior Sensor Array Disassembly
The "Triple Cam" housing behind the rearview mirror is the heart of the Autopilot system.
- Mirror Shroud: Gently pry the two plastic halves apart.
- Electrical: Unplug the camera harness and the humidity sensor. Do not touch the camera lenses with bare fingers.
- Mirror Removal: Twist the mirror base 45 degrees clockwise to release it from the windshield mounting button.
Step 4: The Cut-Out Process
Tesla glass sits very flush with the aluminum frame. Traditional knives often scratch the paint, leading to future rust.
Recommended Tool: Fiber-wire cutting system (e.g., WRD Spider). Set the wire around the perimeter and slowly winch it through the urethane bead, keeping the wire angled away from the interior headliner.
Step 5: Surface Prep & Bonding
The structural integrity of the Model 3 depends on the windshield bond.
- Trimming: Scrape the old urethane down to a thin, level base (approx. 1mm).
- Priming: Apply a single-step glass primer to the new windshield\'s black frit. Use a pinch-weld primer on any areas where the paint was nicked during the cut.
- Adhesive: Use only High-Modulus, Non-Conductive (HMNC) urethane. Apply a consistent "V-bead" to the glass.
Step 6: Installation & Calibration Checks
Lower the glass onto the frame using suction cups. Align the bottom edge with the factory setting blocks to ensure the gap between the windshield and the panoramic roof glass is perfectly even (approx. 3mm).
| Component | Tool / Spec | Critical Note |
|---|---|---|
| Wiper Nuts | 15mm Socket / 25 Nm | Don\'t over-tighten |
| Battery Terminal | 10mm Socket | Must disconnect first |
| Adhesive Type | HMNC Urethane | Ensures sensor accuracy |