Restoring the Integrity of an American Classic: 2007-2013 GMC Sierra 1500 Vent Glass Replacement
The 2007-2013 GMC Sierra 1500, built on the legendary GMT900 platform, represents an era of robust, unapologetic truck engineering. Revered by contractors, fleet managers, and outdoor enthusiasts alike, this workhorse is a staple on Canadian roads. However, its prominent vent glass—often targeted by opportunistic thieves looking for quick cabin access or shattered by wayward highway debris—is a critical vulnerability. A compromised vent glass not only shatters your sense of security but exposes your pristine interior to harsh weather elements and creates an unbearable wind roar at highway speeds.
As a Master Technician at AlexWindshield, I have witnessed countless trucks sidelined by a broken vent window. Replacing the vent glass on this specific generation of the GMC Sierra requires much more than simply slapping in a new piece of glass. It demands a rigorous, highly technical process to ensure flawless integration with the vehicle's complex door anatomy, structural integrity, and weatherproofing systems. Today, I will walk you through our uncompromising, professional standard for replacing the vent glass on your 2007-2013 GMC Sierra 1500.
Why Immediate Vent Glass Replacement is Non-Negotiable
Driving with a shattered or missing vent window in your GMC truck is more than just a cosmetic eyesore; it is a structural and safety hazard. Here is why immediate intervention by a professional auto glass technician is essential:
- Cabin Security: The vent window is the primary target for break-ins. A missing glass panel leaves your valuable tools, electronics, and personal belongings completely exposed.
- Weather Resistance: Moisture penetration from rain or snow can rapidly degrade the electronic components housed inside the Sierra's door panels, leading to costly wiring harness or window regulator failures.
- Acoustic and HVAC Efficiency: An unsealed cabin completely destroys your vehicle's climate control efficiency and introduces deafening wind noise, ruining your driving experience.
- Safety Hazards: Because vent glass is constructed from tempered glass, an impact causes it to explode into thousands of tiny, sharp cubes. Without proper intervention, these fragments pose a serious laceration risk.
The Master Technician's Approach: Step-by-Step GMC Sierra 1500 Vent Glass Replacement
At AlexWindshield, we adhere to strict manufacturer protocols and utilize industry-leading materials. Replacing the vent glass on the 2007-2013 GMC Sierra 1500 requires precise deconstruction of the door assembly, meticulous decontamination, and advanced bonding techniques. Here is our comprehensive A to Z process.
Step 1: Initial Assessment and Interior Protection
Before any tools touch your vehicle, preparation is paramount. We begin by conducting a comprehensive inspection of the door frame to check for any structural distortion caused by the break-in or impact. Next, we implement rigorous interior protection protocols. We lay down heavy-duty protective covers over your Sierra's seats, center console, and floor mats. To protect the exterior, we apply automotive-grade masking tape to the painted surfaces surrounding the door frame, ensuring that zero scratches or scuffs occur during the extraction and installation phases.
Step 2: Door Panel and Hardware Removal
Because the vent glass is deeply integrated into the door shell, accessing its mounting points requires the complete removal of the interior trim. Using specialized, non-marring nylon pry tools, we carefully detach the interior door handle bezel and the power window switch cluster, carefully disconnecting the electronic wiring harnesses. We then locate and extract the hidden 10mm bolts securing the door panel to the steel frame. Once unbolted, we gently lift the door card off its retaining hooks, peel back the factory vapor barrier without tearing it, and gain unrestricted access to the door's internal cavity.
Step 3: Thorough Vacuuming of Broken Glass Shards
When tempered vent glass shatters, it sends thousands of granular glass shards deep into the vehicle. Vacuuming all broken glass shards from the vehicle's interior and the internal door cavity is a mandatory and meticulous step. Using an industrial-grade, high-suction HEPA vacuum, we extract every single shard from your seats, carpets, and air vents. We then direct the vacuum nozzle deep inside the steel door shell. Leaving even a handful of glass cubes inside the door will not only cause a maddening rattling sound every time you hit a bump, but it can also severely jam the main window regulator tracks, leading to future mechanical failures.
Step 4: Removing the Division Bar and Old Glass Hardware
The vent glass on the GMC Sierra is separated from the main roll-down door glass by a vertical metal guide called the division bar. To extract the remnants of the old vent glass, we must lower the main door glass and carefully unbolt the division bar at its top and bottom mounting points. We peel back the thick rubber window run channel weatherstripping. With the division bar loose, we extract the shattered, encapsulated frame of the old vent glass, ensuring no hidden fragments remain lodged in the surrounding weather seals.
Step 5: Surface Cleaning, Primer Application, and High-Quality Adhesive
Even though the vent glass utilizes a combination of mechanical fasteners and heavy-duty weather seals, securing an encapsulated vent assembly—especially one subjected to the heavy vibrations of a rugged truck—often requires supplemental bonding to guarantee a 100% waterproof seal against the vehicle's pinch weld. First, we perform an intensive surface cleaning, using alcohol-based auto glass prep solvents to strip away dirt, old butyl, and debris from the mounting perimeter.
Next comes the crucial chemical bonding phase. We meticulously brush an advanced, anti-corrosive primer application onto any exposed metal surfaces or scratched paint along the window frame. This primer acts as an essential bonding agent and rust inhibitor. Once the primer has flashed (dried), we extrude a precise, continuous bead of high-quality adhesive—specifically an industry-leading, fast-curing urethane. This advanced urethane adhesive ensures that the newly encapsulated vent glass is permanently bonded to the door frame, restoring the structural rigidity of the cab and preventing even the slightest water intrusion.
Step 6: Precision Installation of the New Vent Glass
With the adhesive laid and the weatherstripping prepared, we carefully guide the premium, OEM-equivalent new vent glass into position. This requires deft handling to ensure the glass slides perfectly under the lip of the vehicle's exterior trim without smearing the freshly applied urethane adhesive. We firmly press the encapsulated glass into the frame, allowing the adhesive to bite into the primer. We then reinstall the division bar, tightening the 10mm bolts to factory torque specifications, and securely seat the thick rubber run channel around both the new vent window and the main door glass.
Step 7: Reassembly, Curing, and Final Testing
While the high-quality urethane adhesive begins its rapid chemical curing process, we reassemble the door components. The vapor barrier is resealed to block moisture, and the interior door panel is carefully hooked back into place. We reconnect all electronic harnesses, ensuring the power windows, mirrors, and door locks function flawlessly. Finally, we clean the newly installed vent glass with a streak-free, ammonia-free glass cleaner and perform a rigorous quality assurance check, testing the main window's upward and downward travel to ensure absolutely zero friction or binding against the newly installed vent frame.
Premium Mobile Auto Glass Service Across the Greater Toronto Area (GTA)
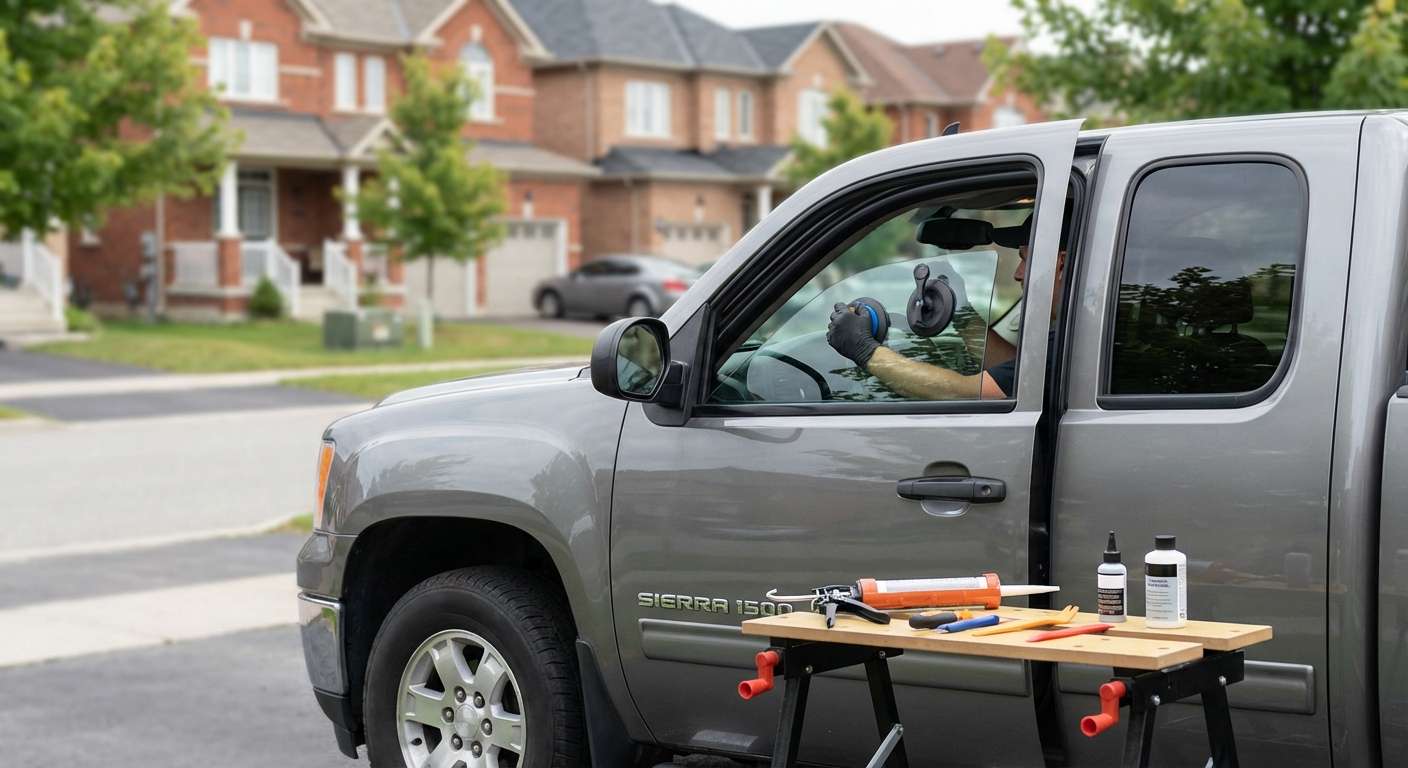
We know that your 2007-2013 GMC Sierra 1500 is likely your daily driver, your mobile office, or your primary work truck. Taking time out of your busy schedule to sit in a repair shop waiting room is simply not an option. That is why AlexWindshield brings our state-of-the-art auto glass shop directly to you.
We provide fully equipped, mobile auto glass replacement services right to your home driveway, corporate parking lot, or active construction site across the Greater Toronto Area (GTA). Whether you are navigating the busy commercial sectors of Vaughan, enjoying the suburban tranquility of Richmond Hill, or working on a development site in Markham, our Master Technicians will arrive promptly with all the specialized tools, premium urethane adhesives, and high-quality auto glass required to complete the job on-site. We operate strictly around your schedule, minimizing your downtime so you can get back on the road safely and swiftly.
The AlexWindshield Guarantee: A Lifetime Warranty You Can Trust
When you trust your vehicle to a Master Technician, you expect absolute perfection, and we deliver nothing less. At AlexWindshield, we do not cut corners, we do not reuse damaged weather seals, and we never compromise on the quality of our urethane adhesives.
Because we adhere strictly to our rigorous A to Z replacement process—from meticulous glass shard vacuuming to exact primer application—we confidently back every GMC Sierra 1500 vent glass replacement with our comprehensive Lifetime Warranty. This industry-leading guarantee covers any issues related to workmanship, including wind noise, water leaks, or manufacturer defects in the glass itself, for as long as you own the vehicle. If you are dealing with a shattered vent window, do not leave your truck vulnerable to the elements or theft for another day. Contact AlexWindshield, the trusted experts for mobile auto glass services in the GTA, and experience the gold standard in automotive glass repair.