Restoring the Backbone of Your Workhorse: GMC Sierra HD 2500/3500 (2007-2014) Back Glass Replacement
The 2007-2014 GMC Sierra HD 2500 and 3500 are undeniable titans of the job site. Built with heavy-duty frames, immense towing capacities, and legendary powertrain options, these trucks were engineered to handle the toughest environments in North America. However, when you are constantly hauling lumber, metal pipes, construction debris, or heavy toolboxes, your truck's back glass is directly in the line of fire. A sudden stop or a shifting payload can easily send a piece of cargo crashing right through the rear window. Because the back glass of your truck protects the interior cabin from harsh weather, road noise, and theft, driving with a shattered rear window is simply not an option.
As a Master Technician at AlexWindshield, I have replaced countless rear windows on this specific generation of GM heavy-duty trucks. Whether your Sierra HD features a standard solid pane, a manual sliding window, or a fully powered sliding rear glass with heated defroster grids, the replacement process requires rigorous technical precision. Replacing the back glass on a heavy-duty pickup is drastically different from a standard windshield repair. It involves meticulous interior tear-down, extensive safety cleanup, and structural bonding techniques to ensure the new glass withstands the flex and vibration of a heavy-duty truck.
Understanding the Tempered Glass Shatter Profile
Unlike windshields, which are made of laminated glass designed to crack but stay intact, the rear window of your 2007-2014 GMC Sierra HD is manufactured using tempered safety glass. When subjected to an impact, tempered glass is engineered to instantaneously explode into thousands of tiny, blunt, pebble-like shards. While this prevents large, lethal guillotine-like shards from injuring passengers, it creates an immense mess inside the cab of your truck. These tiny glass pieces find their way into the rear seat folds, down into the carpet fibres, and deep inside the interior trim panels. This is why a professional replacement involves much more than just gluing in a new piece of glass—it is a comprehensive interior restoration and structural installation.
Complete Step-by-Step Back Glass Replacement Process for GMC Sierra HD (2007-2014)
At AlexWindshield, we do not cut corners. Our A-to-Z replacement protocol strictly adheres to the highest safety and quality standards in the auto glass industry. Here is exactly how our senior technicians execute a flawless back glass replacement on your GMC Sierra HD.
Step 1: Vehicle Preparation and Interior Protection
The moment we arrive at your location, our first priority is protecting the interior of your truck. We begin by applying heavy-duty protective drop cloths over your rear seats—whether you have the standard vinyl work-truck bench or the premium leather seating found in the Denali trims. We also drape protective coverings over the exterior truck bed and tailgate to prevent any scratching of the paint or damage to your bed liner during the extraction process. Safety goggles and cut-resistant Kevlar gloves are equipped before handling the shattered glass.
Step 2: Deep-Extraction Vacuuming of Tempered Glass Shards
Because the Sierra's rear window shatters into thousands of pieces, comprehensive glass cleanup is a mandatory and critical step. We fold the rear seats forward (and upward, depending on your cab configuration) to expose the rear cab wall. Using high-powered industrial vacuums, we meticulously extract every single shard of broken glass. We vacuum the seat tracks, the carpet, child-seat anchor points, and the crevices behind the rear seatbacks. Vacuuming all broken glass shards from the vehicle's interior ensures the safety of your passengers and prevents annoying rattles when driving.
Step 3: Removing Interior Trim Panels and Disconnecting Electronics
To safely access the urethane bonding area, we must remove the interior trim. Our technicians use specialized, non-marring pry tools to carefully detach the rear C-pillar interior trim panels and the overhead headliner clips. If your 2007-2014 Sierra HD is equipped with a heated rear window, we carefully unplug the defroster grid wiring harnesses. If you have a power-sliding rear window, we disconnect the motor cables and slide-track mechanisms. Once the interior is stripped back, we remove the third brake light/cargo lamp assembly on the exterior roof to gain clear access to the top edge of the glass.
Step 4: Cutting the Urethane and Removing the Damaged Glass
With the perimeter fully exposed, we use advanced auto glass cut-out tools—such as a braided wire-out system or a specialized cold knife—to slice through the factory polyurethane adhesive holding the remaining glass frame to the steel pinch weld. We carefully pull the old window frame away from the truck cab, ensuring no structural damage occurs to the surrounding steel.
Step 5: Surface Cleaning and Pinch Weld Preparation
The strength of the new window depends entirely on the preparation of the bonding surface. We use razor scrapers to trim the old urethane bead down to a uniform 1-2 millimetres. This provides a perfect base for the new adhesive. We then use a specialized, lint-free cloth and an alcohol-based prep solvent to aggressively clean the entire pinch weld area, removing dirt, moisture, and road grime. Any dust left behind can compromise the final seal.
Step 6: Primer Application for Rust Prevention and Ultimate Bonding
During the glass removal process, microscopic scratches to the paint on the pinch weld can occur. We apply an advanced, fast-drying metal primer to any exposed bare steel. This is a critical step to prevent rust from forming beneath the glass—a common issue with poorly installed auto glass. We also apply a specialized glass primer to the frit band (the black border) of the brand-new GMC Sierra back glass. This chemical activator ensures the adhesive chemically fuses to the glass surface.
Step 7: Applying High-Quality Urethane Adhesive
Once the primers have flashed (dried), we apply a continuous, thick V-shaped bead of premium, OEM-grade, high-modulus urethane adhesive around the entire perimeter of the pinch weld. We use an electric caulking gun to ensure the bead is perfectly consistent, which is paramount for preventing water leaks, whistling wind noises, and structural failure.
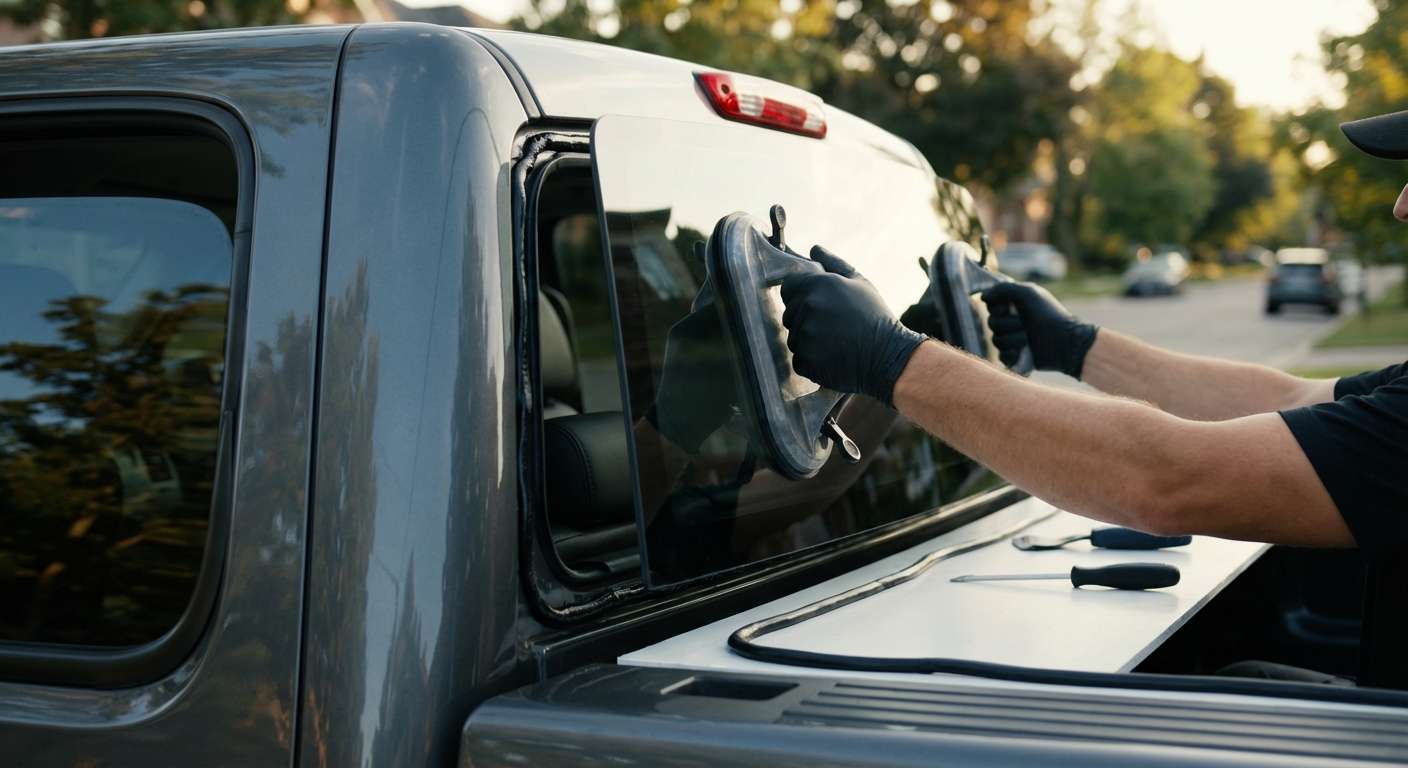
Step 8: Precision Installation of the New Back Glass
Using heavy-duty suction cup lifters, two technicians carefully lift the new back glass into position. For the Sierra HD, precision is key. We perfectly align the glass with the cab's structural contours before gently pressing it into the wet urethane bead. We apply even pressure to ensure a watertight seal is formed around the entire circumference. We then secure the glass with specialized retention tape to hold it perfectly in place while the urethane begins its chemical curing process.
Step 9: Reassembly, Reconnection, and Final Inspection
With the glass firmly set, we begin the reassembly phase. We meticulously reinstall the interior C-pillar trim panels, the headliner clips, and the exterior third brake light. We reconnect all electronic harnesses, ensuring the defroster grids and power sliding window mechanisms are fully operational and tested. Finally, we clean the new rear window inside and out with professional glass cleaner. We inform the client of the specific Safe Drive-Away Time (SDAT) to ensure the high-quality adhesive has properly cured before the truck hits the road.
Addressing Solid vs. Sliding Rear Windows
The 2007-2014 GMC Sierra HD lineup offered several rear window configurations. At AlexWindshield, we source and install all variations, ensuring an exact OEM-match for your specific truck:
- Solid Single-Pane Glass: The standard for most heavy-duty work trucks, offering maximum durability and excellent rearward visibility.
- Manual Sliding Glass: Features a central pane that manually unlatches, providing excellent cabin ventilation.
- Power Sliding Glass: Controlled via a switch in the overhead console, allowing you to open the rear window electronically. This requires precise reconnection of the internal motor tracks.
- Heated Defroster Glass: Essential for Canadian winters, featuring integrated thermal grids that melt ice and snow.
Your Local Mobile Auto Glass Experts in the Greater Toronto Area (GTA)
We know that a GMC Sierra HD 2500 or 3500 is often a commercial vehicle, meaning downtime translates directly to lost revenue. You do not have time to sit in a repair shop waiting room. That is why AlexWindshield brings the auto glass shop directly to you.
Our fleet of fully equipped, climate-controlled mobile service vans operates seamlessly across the Greater Toronto Area (GTA). Whether your truck is parked at a busy construction site in Vaughan, resting in a residential driveway in Richmond Hill, or loading up at a commercial fleet yard in Markham, our Master Technicians will arrive on-site to perform the replacement. We handle the mess, the heavy lifting, and the precision installation right where you are, getting you and your truck back to work as quickly as possible.
Choose AlexWindshield for Unmatched Quality and Peace of Mind
Replacing the back glass on a heavy-duty truck requires specialized knowledge of truck cab architecture, advanced urethane bonding chemistry, and a commitment to meticulous cleanup. Trusting a subpar technician can result in persistent water leaks, severe interior rust, or a glass panel that pops out over rough terrain.
When you choose AlexWindshield, you are choosing industry-leading expertise. We pride ourselves on using top-tier materials, adhering to the strictest safety protocols, and treating your vehicle with the utmost respect. Every installation we perform is backed by our comprehensive Lifetime Warranty, which guarantees our workmanship against any water leaks, wind noises, or manufacturer defects for as long as you own your truck. If you need a reliable, professional, and entirely mobile auto glass replacement in the GTA, contact AlexWindshield today and experience the gold standard in automotive glass repair.