Restoring the King of SUVs: Expert GMC Yukon Back Glass Replacement
When the GMT800 platform redefined the modern SUV, the GMC Yukon and Yukon XL 2000-2006 quickly became the undisputed kings of the North American road. Built for heavy-duty family hauling, cross-country road trips, and rugged utility, these vehicles feature a massive cabin protected by expansive automotive glass. However, when the rear windshield—or back glass—shatters, that expansive cabin is instantly exposed to the harsh elements, road noise, and security risks. Unlike a front windshield that cracks but stays intact, the rear glass on your GMC Yukon is constructed from tempered glass, meaning an impact will cause it to violently explode into thousands of tiny, pebble-like shards.
At AlexWindshield, we know that replacing the back glass on a classic 2000-2006 GMC Yukon requires much more than just slapping on a new piece of glass. It demands deep technical knowledge of the vehicle's rear liftgate mechanics, an obsessive dedication to cleaning up hazardous glass shards, and the use of premium-grade adhesives to ensure a perfect, watertight seal. As a Master Technician, I have designed our back glass replacement process to perfectly accommodate the specific engineering of the early 2000s GMC Yukon and Yukon XL.
Why the 2000-2006 GMC Yukon Rear Glass Requires Specialist Attention
The GMC Yukon back glass from this generation comes with its own set of unique technical characteristics. Depending on your exact trim level (SLE, SLT, or Denali), the rear hatch may feature a distinct defroster grid system, integrated third brake light wiring, and heavy-duty gas struts that support the liftglass. When the glass shatters, it doesn't just fall onto the road; it falls deep into the interior cargo area and plunges down into the internal cavity of the rear tailgate shell. Failing to remove these shards will result in maddening rattling noises every time you hit a bump or close the rear hatch.
Our Master Technician Process: Step-by-Step Back Glass Replacement
To guarantee a flawless installation and ensure the absolute safety of your vehicle's occupants, AlexWindshield follows a strict, manufacturer-approved A-to-Z replacement protocol. Here is exactly how we handle your GMC Yukon XL rear windshield replacement:
Step 1: Thorough Pre-Inspection and Extensive Interior Protection
Before any tools are brought out, we conduct a comprehensive assessment of the rear liftgate area. We inspect the frame for any signs of pre-existing rust or damage—a common issue on vehicles from the 2000-2006 era. Because tempered back glass shatters violently, our first physical step is to completely isolate and protect the interior of your SUV. We lay down heavy-duty protective blankets over the third-row seating, cargo floor, and rear bumper to ensure no residual glass shards or chemical adhesives cause damage to your Yukon's interior upholstery or exterior paint.
Step 2: Tailgate Panel Removal and Intensive Glass Vacuuming
This is a critical step that separates amateur installers from Master Technicians. When a rear window blows out, thousands of glass fragments fall directly inside the liftgate door shell. We carefully unclip and remove the interior rear door panels using specialized non-marring trim tools, ensuring we do not break the aging plastic retaining clips common in early 2000s GM vehicles.
Once the inner panel is removed, we utilize a high-powered industrial shop vacuum to meticulously extract every single shard of broken glass from the cargo area, the crevices of the rear seats, and the deep internal cavities of the tailgate. We physically shake the liftgate to dislodge stubborn pieces hidden behind locking mechanisms, vacuuming repeatedly until the door is completely silent and clear of all debris. This guarantees that your tailgate won't rattle and that the mechanical latch and lock systems won't jam due to trapped glass.
Step 3: Removing the Old Urethane and Preparing the Pinch Weld
With the area cleaned and prepped, we move on to preparing the vehicle frame. We disconnect the gas struts, rear wiper motor connections (if applicable), and the wiring harnesses for the rear window defroster. Using a combination of cold knives and precision wire-cutting systems, we carefully slice through the remaining original factory urethane. We trim the old adhesive down to a thin, uniform base layer of about 1 to 2 millimeters. This meticulous trimming provides an optimal bonding surface for the new urethane while protecting the vehicle's paint. Any dirt, road grime, or residual debris on the pinch weld is then rigorously cleaned using specialized automotive glass surface cleaners.
Step 4: Primer Application for Adhesion and Rust Prevention
Older vehicles like the 2000-2006 GMC Yukon are prone to rust around the window frames. If we discover any exposed bare metal or minor surface rust during the old adhesive removal, we immediately treat the area. We apply a highly specialized, fast-drying glass and body primer to the pinch weld. This vital step serves two purposes: it creates an impenetrable barrier against future oxidation and rust, and it acts as a chemical promoter that allows the new urethane adhesive to securely bite into the vehicle's frame.
Step 5: Preparing the New Back Glass and Defroster Reconnection
We source only premium, OEM-equivalent back glass tailored specifically for the GMT800 GMC Yukon and Yukon XL. The new glass is placed on a secure glass stand, where we clean the inner surface with a high-grade, streak-free glass cleaner. We then apply a specialized glass primer to the ceramic frit band (the black border around the glass). During this stage, we also inspect and prepare the defroster tabs, ensuring the electrical connections for your rear window heating grid are clean and ready to be seamlessly reconnected to your vehicle's wiring harness.
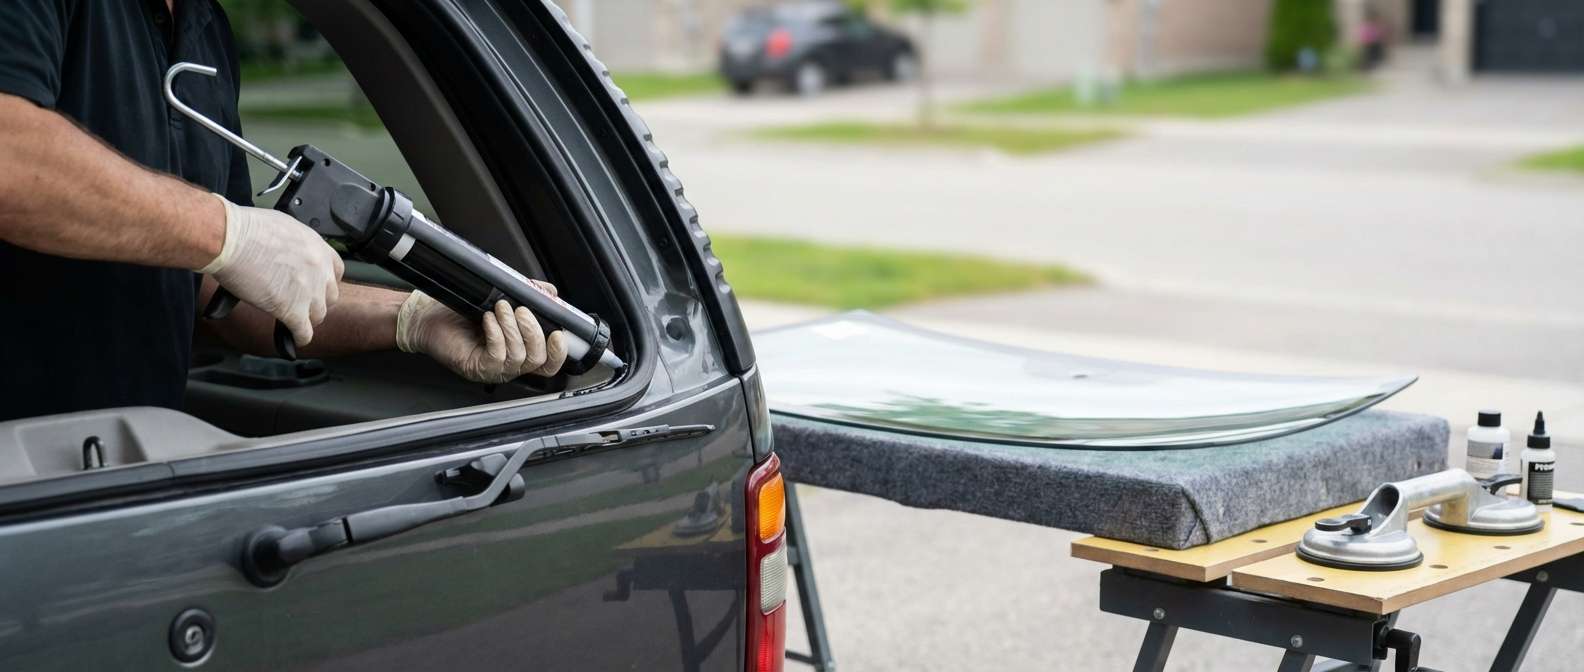
Step 6: Precision Installation Using Premium Urethane Adhesive
The longevity and structural integrity of a rear windshield depend entirely on the quality of the adhesive and the geometry of the bead. At AlexWindshield, we strictly use high-viscosity, fast-curing automotive urethane. Using an electric caulking gun, we apply a consistent, precisely measured "V-bead" of urethane directly onto the vehicle's prepared pinch weld. The V-shape ensures that when the glass is applied, the adhesive compresses perfectly to eliminate any gaps, air pockets, or potential water leaks.
With the adhesive laid down perfectly, two technicians carefully lift the heavy back glass and precisely align it with the contours of the Yukon's rear hatch. Once set into place, we apply gentle, even pressure to ensure a watertight seal. We then reconnect the rear defroster wiring, reattach the gas liftgate struts, and securely reinstall the interior door panels that were removed during the vacuuming stage.
Step 7: Final Cleanup, Inspection, and Safe Drive-Away Time
Once the glass is locked into place, we conduct a final, rigorous cleaning of the new window and run a comprehensive diagnostic check to ensure the rear defroster and any associated liftgate electronics are functioning flawlessly. We strictly adhere to the manufacturer's Safe Drive-Away Time (SDAT) guidelines, allowing the premium urethane to cure to a safe structural strength before the vehicle is operated. Finally, we do one last sweep of your cargo area to guarantee it is spotless and ready for your next family road trip or grocery run.
Premium Local SEO: Mobile Auto Glass Service Across the GTA
Driving a massive vehicle like a Yukon with a shattered back window is not just uncomfortable; it is incredibly dangerous. That is why AlexWindshield brings the glass shop directly to your doorstep. We proudly offer fully equipped mobile auto glass replacement across the Greater Toronto Area (GTA). Whether you are parked in a residential driveway or a commercial lot, our Master Technicians will come to you.
- Vaughan: From Woodbridge to Maple, we provide rapid, reliable mobile back glass replacement right in your Vaughan driveway, ensuring your Yukon is secured against unpredictable weather.
- Richmond Hill: If you suffer a rear window blowout near Yonge Street or Highway 404, our Richmond Hill auto glass repair team will be dispatched quickly to clean out the shattered glass and install a fresh, durable rear windshield.
- Markham: Navigating Markham with a compromised rear view is hazardous. Our fully mobile service vehicles are equipped with everything needed to perform a factory-grade rear glass replacement on-site in Markham.
- Complete GTA Coverage: We service all surrounding neighborhoods in the Greater Toronto Area, bringing absolute convenience and Master-level technical expertise directly to your location.
Book Your GMC Yukon Back Glass Replacement Today
Your 2000-2006 GMC Yukon was built to endure, and its auto glass should be no different. Don't let a shattered back window compromise the security, climate control, and interior comfort of your SUV. Trust the leading experts in the industry to restore your vehicle safely and efficiently.
When you choose AlexWindshield for your mobile auto glass services in the GTA, you are choosing unparalleled craftsmanship, comprehensive interior protection, and a commitment to meticulous shattered glass cleanup. Best of all, every single back glass installation we perform is backed by our industry-leading Lifetime Warranty against leaks, wind noise, and workmanship defects. Contact AlexWindshield today to schedule your GMC Yukon rear glass replacement and experience the gold standard of mobile auto glass repair.