The Precision Aesthetics of the U25: Masterful Vent Glass Replacement for Your MINI Countryman 2024-2027
The 2024-2027 MINI Countryman (U25 generation) is a masterclass in modern British-Bavarian engineering, boasting an enlarged footprint, a rugged yet sophisticated stance, and a strikingly angular greenhouse. The vent glass on this specific chassis—whether situated at the rear door perimeter or integrated into the vehicle's dynamic C-pillar—isn't just a window; it is a critical structural and aesthetic component that integrates flawlessly with MINI’s signature floating roof illusion. When this precise piece of auto glass suffers damage from road debris, an unexpected collision, or unfortunately, a smash-and-grab break-in, it completely compromises both the security and the striking aesthetic of your vehicle. At AlexWindshield, we bring specialized, master-level technician skills to restore your U25 MINI Countryman back to its flawless factory condition.
Understanding the Structural Importance of Your U25 Vent Glass
Modern vehicle architectures like the U25 MINI Countryman utilize encapsulated vent glass that does more than just let light into the cabin. It contributes to the overall rigidity of the vehicle's side profile, aids in optimal acoustic dampening to keep road noise out of the premium cabin, and houses integrated weather stripping that prevents moisture intrusion. Because the vent glass is often uniquely shaped and permanently bonded to the vehicle frame with high-strength urethane, replacing it is not a simple bolt-on job. It requires an exact, methodical approach executed by a Master Technician who understands the specific tolerances of the 2024-2027 MINI Countryman.
Our Master Technician’s Step-by-Step Vent Glass Replacement Process (A to Z)
At AlexWindshield, we do not cut corners. We follow a rigorous, factory-approved installation protocol to ensure that your new vent glass is perfectly aligned, completely watertight, and structurally sound. Here is the detailed, A to Z breakdown of our professional replacement process:
Step 1: Pre-Installation Inspection and Rigorous Interior Protection
Before any tools are lifted, we conduct a comprehensive visual inspection of the damage. We map out the frame around the damaged vent glass to ensure the surrounding metal and paint have not been compromised. We then apply specialized automotive-grade protective tape around the exterior body panels to guard the U25’s pristine clear coat against any accidental scratches. Inside the vehicle, we drape heavy-duty protective covers over the MINI’s premium interior upholstery, seats, and central console to shield them from dust, debris, and adhesives.
Step 2: Interior Trim and Door Panel Removal & Complete Glass Evacuation
Vent glass is frequently the target of break-ins, which means shattered tempered glass is almost always an issue. Because this glass is typically housed near or within the rear door or quarter panel assembly, we must carefully dismantle the interior components. Using specialized non-marring nylon pry tools, we meticulously remove the interior door panels, C-pillar trim, and weather seals, being highly cautious not to damage the U25’s sophisticated interior ambient lighting wiring harnesses. Once the internal cavity is exposed, we utilize a high-powered industrial HEPA vacuum to extract every single microscopic broken glass shard from the interior cabin, the seat crevices, and deep within the door’s internal frame. Failing to thoroughly vacuum this area results in annoying rattles when driving; we ensure your MINI remains whisper-quiet.
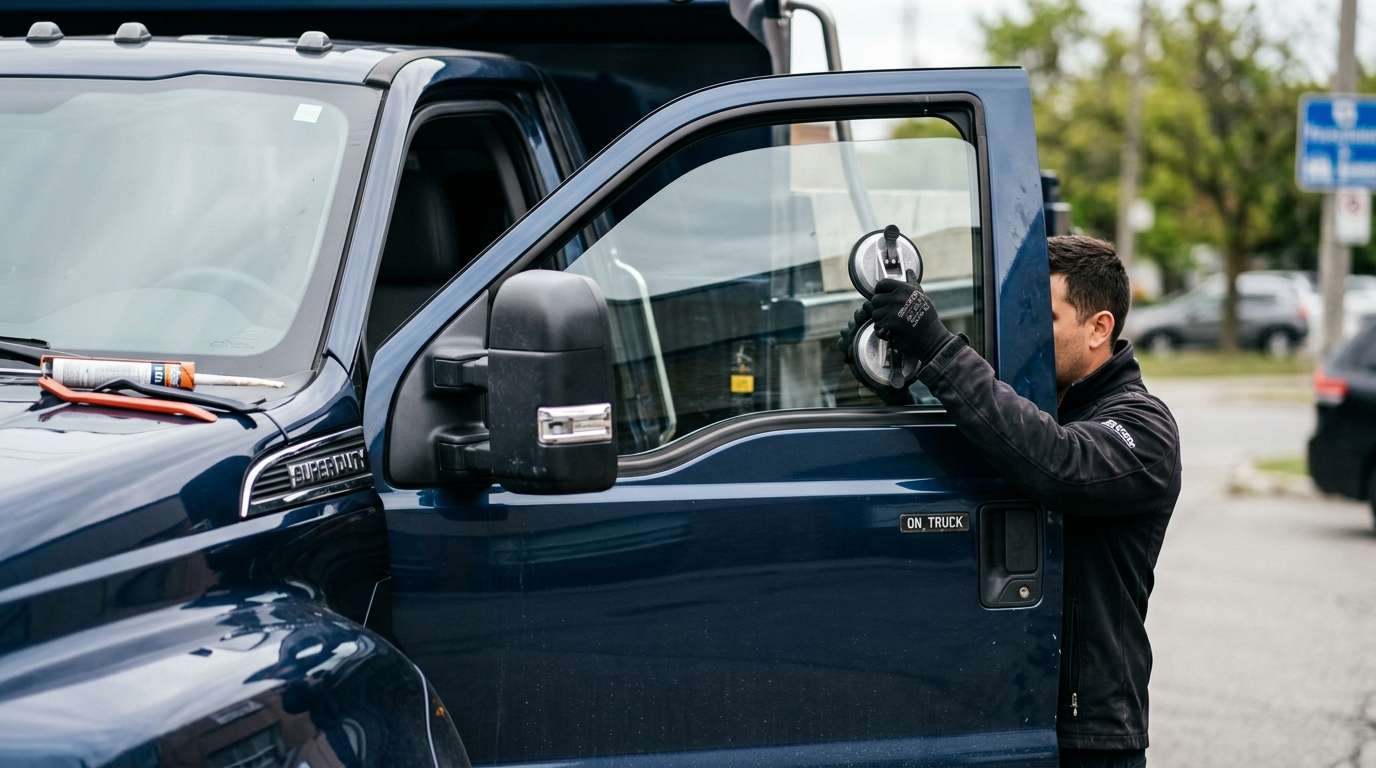
Step 3: Precision Extraction of the Damaged Vent Glass
If the glass is fully shattered, we clear the remaining bonded glass fragments from the frame. If the glass is simply cracked but intact, we utilize advanced auto glass cut-out tools. We prefer using a high-tensile wire or fiber line cutting system rather than traditional cold knives whenever possible. This specialized wire slices smoothly through the old factory polyurethane adhesive from the inside out, completely mitigating the risk of scratching the bare metal pinch weld. Protecting the pinch weld is absolutely critical to preventing future oxidation and rust.
Step 4: Surface Cleaning and Pinch Weld Preparation
Once the old glass or encapsulated frame is completely removed, we are left with the old adhesive bed. A Master Technician will use a razor-sharp specialized scraper to cleanly trim the existing urethane down to a perfectly flat, thin layer—about 1-2 millimeters thick. This thin layer of old urethane actually provides the best bonding surface for the new urethane. We then clean the entire channel and the surrounding auto body meticulously with high-grade, lint-free wipes and alcohol-based auto glass cleaners to strip away all dirt, moisture, and natural oils.
Step 5: Advanced Primer Application
Preparation is the secret to a lifetime bond. If any bare metal was exposed on the pinch weld during the removal process, we immediately treat it with a specialized anti-corrosion bare-metal primer. Next, we prepare the new OEM-quality replacement vent glass. The glass is rigorously cleaned, and a premium glass primer is applied to the frit band (the black painted edge of the glass). This chemical primer activates the surface of the glass, creating a molecular bond that ensures the upcoming urethane adhesive will adhere with maximum structural integrity.
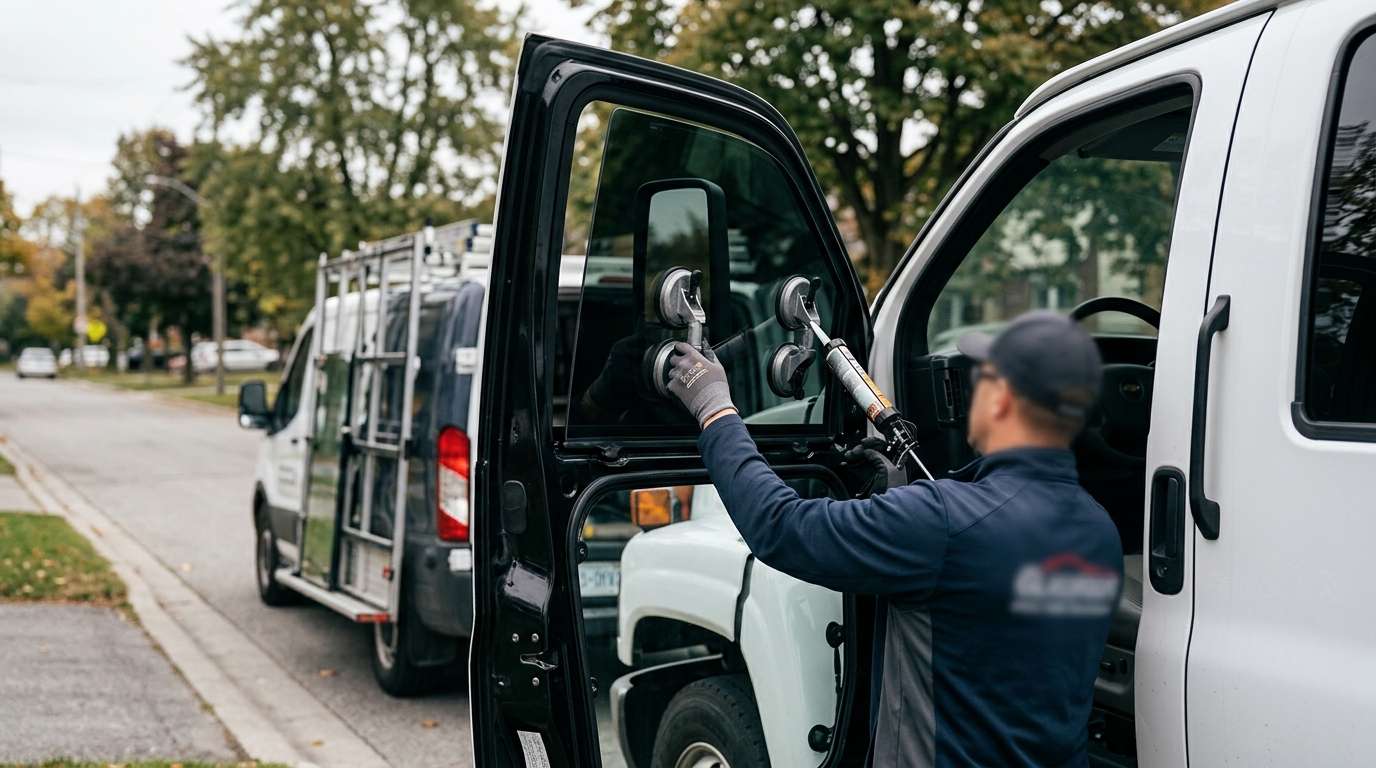
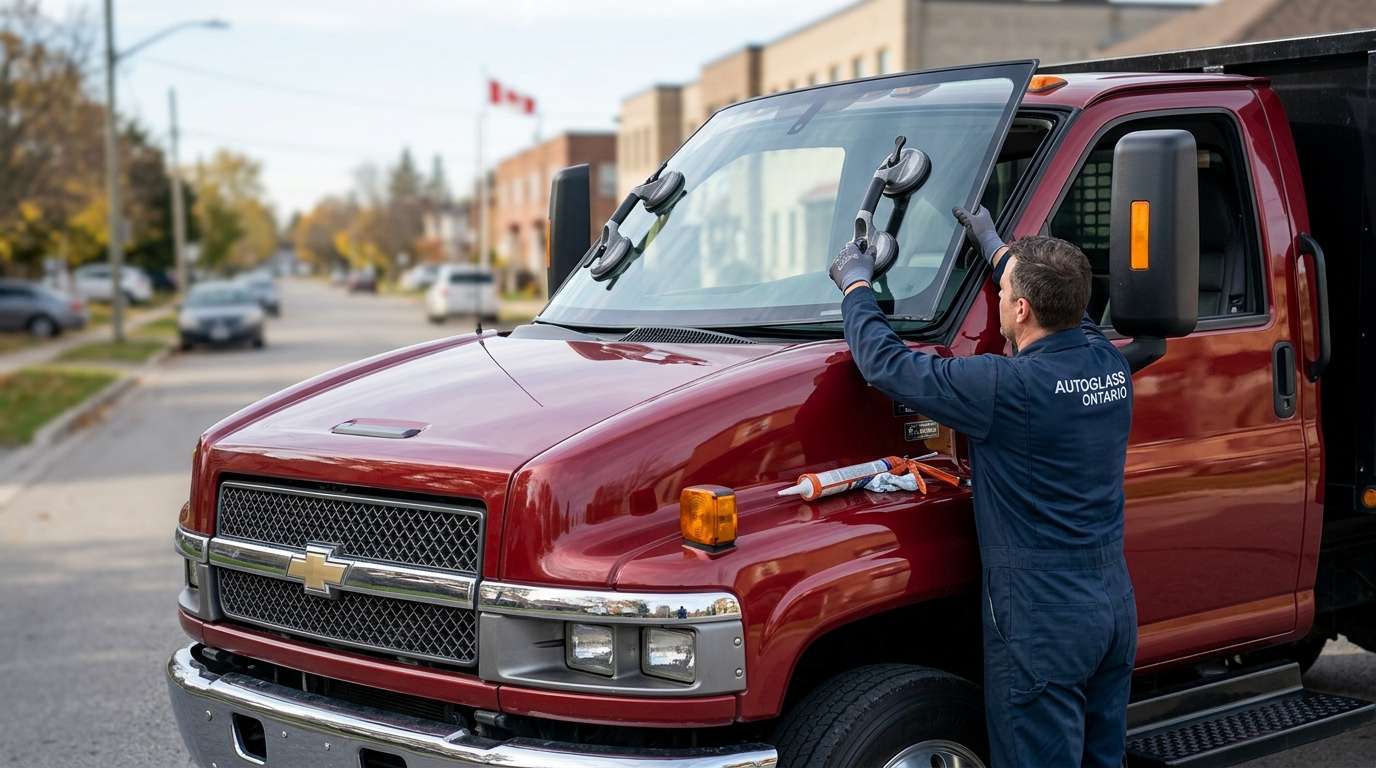
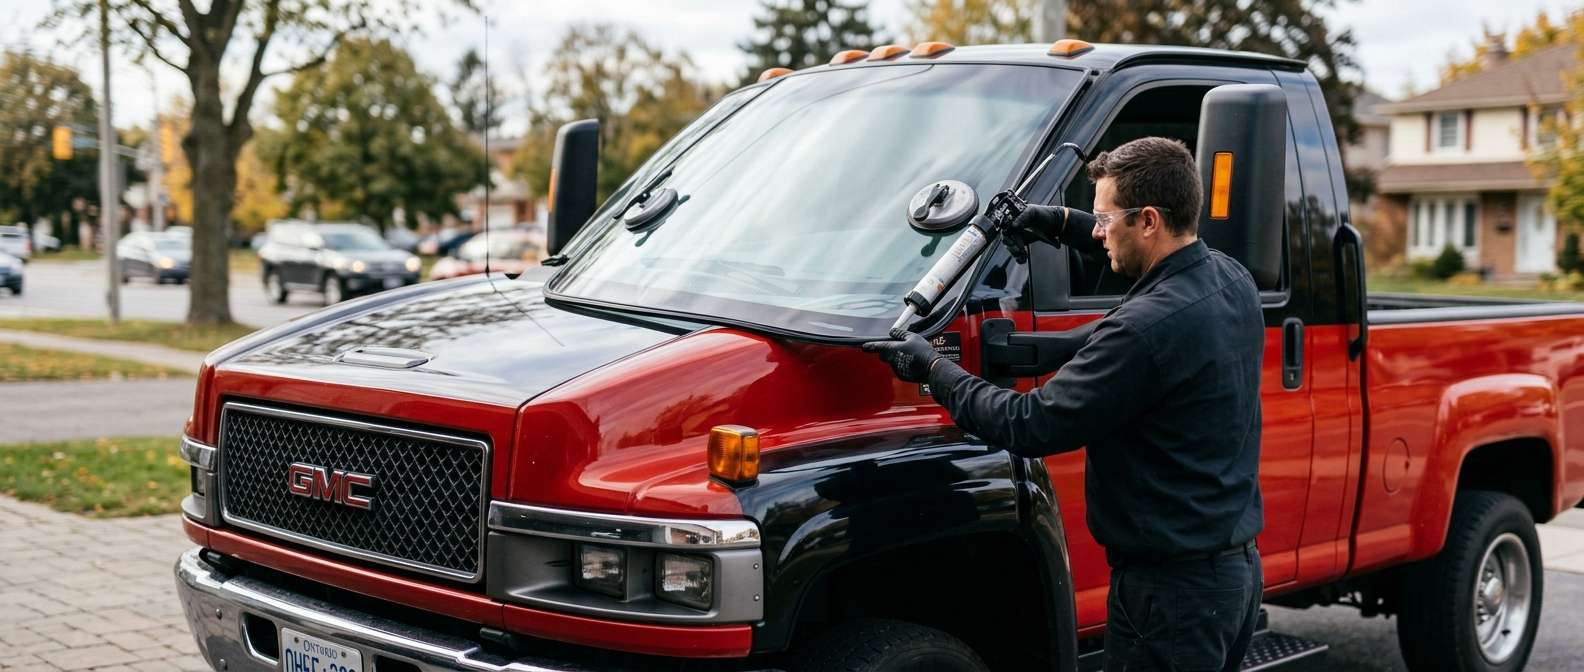
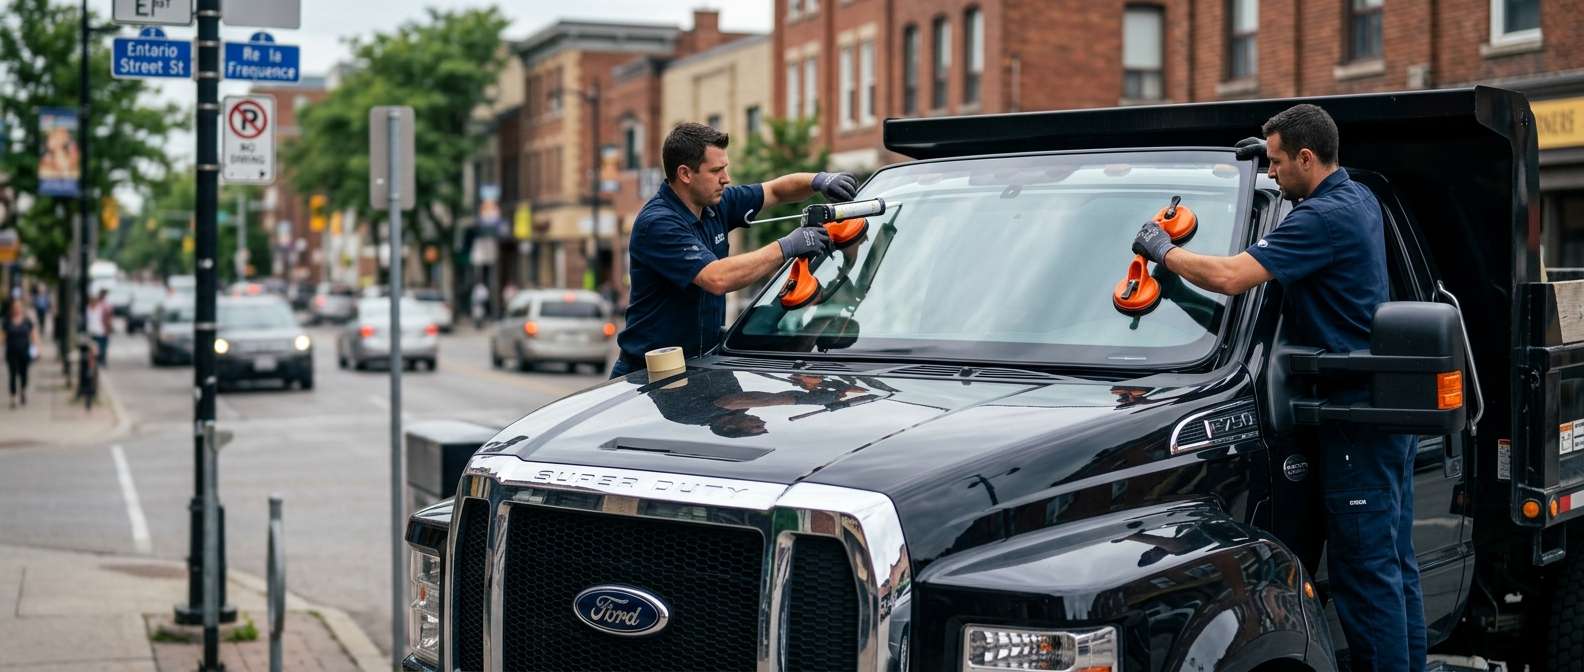
Step 6: High-Quality Urethane Adhesive Application and Installation
With the surfaces prepped and primed, we load our electric caulking gun with an industry-leading, fast-curing polyurethane adhesive. The adhesive is applied onto the pinch weld (or directly onto the glass encapsulation) in a highly precise V-notch bead. The V-shape ensures that when the glass is pressed into place, the adhesive collapses evenly, eliminating any air pockets or gaps that could cause whistling or water leaks. The new U25 MINI vent glass is then carefully lifted and set into the exact factory position. We use suction cups and precise measuring points to ensure the gaps and flushness perfectly match the MINI factory specifications.
Step 7: Reassembly, Curing, and Final Cleanup
Once the glass is expertly seated, we secure it with retention tape while the high-quality adhesive undergoes its rapid chemical curing process. During this Safe Drive-Away Time (SDAT), we systematically reassemble your interior trim and door panels, reconnecting any wiring harnesses and securely snapping all OEM retention clips back into their rightful places. A final, exhaustive vacuuming is performed to ensure absolute perfection, followed by a streak-free cleaning of the newly installed glass. We then verify that all seals are flush and watertight.
Mobile Auto Glass Services Across the Greater Toronto Area (GTA)
We understand that dealing with a shattered vent glass is highly stressful, and driving a vehicle with an open window compromises your safety and exposes your sophisticated MINI Countryman to the unpredictable Canadian weather. That is why AlexWindshield offers premium, fully equipped mobile auto glass services across the Greater Toronto Area (GTA).
You do not need to take time out of your busy schedule to visit a shop. Our Master Technicians will bring the highest level of service directly to your home driveway, your office parking lot, or wherever your vehicle is safely parked. We proudly provide rapid-response, reliable mobile coverage to key regions, specifically serving:
- Vaughan: From Woodbridge to Maple, we provide on-site vent glass replacements ensuring you get back on the road safely.
- Richmond Hill: Enjoy seamless, dealership-quality auto glass services brought directly to your location without the dealership price tag.
- Markham: Our mobile fleet operates extensively throughout Markham, offering precision installations with zero hassle for our clients.
- And the wider GTA: Wherever you are located within the Greater Toronto Area, AlexWindshield is your local auto glass authority.
The AlexWindshield Guarantee: Expertise You Can Trust
Your 2024-2027 MINI Countryman (U25) is an investment in premium automotive engineering, and it deserves to be treated by professionals who respect the craft. Why do luxury and modern vehicle owners continually choose us?
- Master Technicians: Our installers are not just mechanics; they are elite auto glass specialists trained in the precise tolerances of modern European and compact luxury SUVs.
- Premium Materials: We use only OEE (Original Equipment Equivalent) or OEM glass, paired with top-tier, crash-tested urethane adhesives to guarantee structural safety.
- Meticulous Cleanup: We pride ourselves on leaving your vehicle cleaner than we found it, taking special care to completely eradicate hazardous glass shards from your interior.
- Comprehensive Lifetime Warranty: We stand boldly behind our craftsmanship. Every vent glass replacement performed by AlexWindshield is backed by an industry-leading Lifetime Warranty covering any air leaks, water leaks, or manufacturer defects in the glass for as long as you own the vehicle.
Restore Your MINI Countryman Today with AlexWindshield
Do not let a broken vent glass disrupt your peace of mind, compromise your vehicle’s security, or ruin the stunning aesthetics of your 2024-2027 MINI Countryman (U25). Trust the leading experts in the auto glass industry to provide a seamless, stress-free, and technically flawless replacement.
Contact AlexWindshield today to schedule your mobile vent glass replacement in Vaughan, Richmond Hill, Markham, or anywhere across the GTA. Experience the pinnacle of convenience, precision, and customer care. Let our Master Technicians come to you, so you can drive away with absolute confidence, backed by our Lifetime Warranty.